Thursday, November 27, 2025

Jupiter What's RV addon manual

This manual covers the functions and features of the RV addon for the Jupiter What's. 
 For the general information on the base vehicle, please consult the Jupiter What's Manual notecard inworld.
 
Access
- Lock button on the UniHUD operates the outside doors and locks the seats;
- Access control(menu) operates the internal stuff such as cabinets and beds.
 
Passengers
- There is a total of 5 sit positions inside the RV, with up to 4 available simultaneously;
- Passengers can change their position, adjust position, and change animations via menu;
- Additionally, passengers can change their position by clicking on an empty seat and hold down the mouse key for about 2 seconds;
- Beds can be extended by clicking them, and folded back by clicking the base of the beds;
- When right bed is extended, the sofa positions are not available;
- Default seat positions are stored in LSD and can be altered(names: "rv_seat_1" through "_5"). 
 
Curtains
Curtains can be opened and closed by clicking and holding the mouse key. Left, right, and rear curtain can be opened to either side by clicking the opposite side;
- Canopy curtain has 2 mats, so the external one can be tinted separately; 
- Curtain texture is stored in LSD and can be altered(name: "curtain_texture").
 
Table and Fridge 
- To access the fridge, you must lift the table by clicking it. To fold the table down, click the table support. 
 
Lighting 
- Main room light and lavatory light can be turned on and off by using the switch on the back wall of the RV. 
 
Movable addons
- Use following prefixes in prim's description field to make prims move with corresponding parts:
main door: ADDON_RV_DOOR
lavatory door: ADDON_RV_DOOR_WC
left window: ADDON_RV_WINDOW_L
right window: ADDON_RV_WINDOW_R
front canopy: ADDON_RV_CANOPY 
fridge door: ADDON_RV_FRIDGE
left bed: ADDON_BED_L
right bed: ADDON_BED_R
- Addons for the right and left beds go up and down while remaining in one spot, as the beds get folded and unfolded, so they can be used for storing pillows and other stuff.
- Make sure to enable the EDIT MODE when adding more prims. 
  
Customization 
- Cab and RV will have matching color when you change it via menu;
- Both cab and RV can have their custom liveries added separately via menu;
- If painted by the spray can, RV addon texture should be placed in AUX 1 slot;
- Beds, sofa, and curtains can be tinted via sl color;
- Most of the textures can be altered to your liking, link below:
- We've also included a file for Blender 2.79 that should help you with making complex liveries.
 
General changes and fixes 
- Speed limiter can be disabled by adjusting the setting to the lowest value;
- New slope handling code added; 
- New experimental crossing code for the driver added; 
- Restitution value set to 0.0, vehicle should feel less bumpy now;
- Vehicle's 3rd person camera lifted a bit;
- Popup with the RV's online manual added. 


GEMC, 2025

Friday, July 5, 2024

Baiern Alpenjager v2.0 update

The vehicle was coded from the ground up, so it's pretty much a new product in a familiar shell. Main branch is now RL-sized(https://sl-gemc.blogspot.com/2019/03/real-scale-initiative-by-gemc.html) and mod out of the box. Legacy version(nomod) will remain available for some time via CasperVend.

Here's the list of changes:

- updated mesh, some bits are smoother now;

- all doors are now moving smoothly;

- glovebox is a separate prim now and can be used for storing things(see below);

- number of illuminated parts on the interior increased;

- additional light sources added for ceiling lamps; 

- glass tint options added;

- inner part of the windshield is a separate material now, you can adjust its transparency(locked at 25% on legacy version);

- factory wheels got more definition;

- most of the textures got brightened up to work with PBR;

- tail lights retextured;

- headlights are more visible now; 

- sim crossing errors fixed;

 - battery charger is now using animesh;

- vehicle customization moved to menus;

- media screen replaced with a modern unit;

- more buttons now do more stuff(ceiling console buttons can be used for aux equipment);

- console buttons used for screen navigation now control the legacy loops player; 

- outside and climate temp now shows Fahrenheit when output is switched to imperial;

- "max ac" button on the climate pannel now sets the temperature to lowest and turns on the blower fan;

- !GTFO support added;

- CasperUpdate system added;

- GLPS added;

- GMLS added(GMLS id: ALPENJAGER);

- EasyWheels system added(adjsutable camber too);

- movable addons system added, use following prefixes for their respective parts:
ADDON_BONNET
ADDON_DOOR_FL
ADDON_DOOR_FR
ADDON_DOOR_RL
ADDON_DOOR_RR
ADDON_TRUNK_1
ADDON_TRUNK_2
ADDON_GLOVEBOX;

- adjustable ground collider added;

- vehicle handling changed;

- speed lmiter and cruise control added;

- boost system added(think zamani torero v2), with several upgrades;

- engine temperature system upgraded. Now the engine only cuts off if overheated in idle, and can be restarted right away;

- large number of variables moved to LSD and can be queried and modified;

- engine sounds can be changed via LSD;

- more sounds added, such as various button clicks, wipers sounds, etc;

- "acc" to "off" iginition key sequence fixed; 

- figurine is made randomizable;

- other minor fixes and improvements.

Saturday, March 25, 2023

A little rundown on Marshall Senator modding

 In this article gonna give you guys an overview of the things you can do to your Marshall Senator(can be purchased here: https://marketplace.secondlife.com/p/MARSHALL-Senator-Police-Cruiser/24605369).
 
It's mostly gonna be a copy paste from the manuals for other new-ish GEMC-scripted vehicles, but whatever.
 
 
1. GTFO! support - this vehicle supports GTFO! system(https://sl-gtfo.com) out of the box. You can attach your prims to the vehicle and use them as a visual cargo. To do so, change the description of your cargo prims to "CARGO"(without quotation marks) - that will make a prim be recognized by our visual cargo system made for GTFO! Additionally you can use moving prims prefixes with the "CARGO" description, see below.
 
 
 2. Now, did you know that you can make your addon prims move with the vehicle's doors?. In order to do so, add "ADDON_"+[moving prim's description] prefix to their descriptions.
So, if you want your prims to move with the driver's door, set their descriptions to "ADDON_DOOR_FL",
"ADDON_DOOR_FR" for the front passenger's door,
"ADDON_DOOR_RL" for the rear left passenger's door,
"ADDON_DOOR_RR", for the rear right passenger's door,
and "ADDON_BONNET" for the bonnet.
You can combine these prefixes with other stuff in the prim's description, in example: "ADDON_TRUNK_CARGO" - that will make a prim move with the Senator's trunk and be recognized by GTFO! system(very useful if you want to have your cargo mounted on that fancy cargo rack in the back).
Or, for example, I want to have a little curtain on the passenger's door, so I can set it's desc to "ADDON_DOOR_RL_CURTAIN*0.521", so it can be identified by the addons script, and by the main curtain script, that may record some data in there(not that we need to resort to this kind of thing anymore, since we have the linkset data feature now). 
Anyway, keep the fact that you can make one prim participate in multiple systems, in your mind. Also, remember that the more addon prims there is, the slower things perform(now slower, but more choppy, whatever). So if you can combine your addons for a single door into one prim, make sure to do so.


3. Another thing that seem to be puzzling some minds is the wheels. Following text is a straight up copy paste from my other manuals: 
EasyWheels project - I've added some code that lets you install any crappy ripped wheels(provided they're 1 prim each), regardless of their rotation, and without having to fiddle with numbers and whatnot. It can be done in a few simple steps:

1 - Set your car straight.
2 - Enable "Edit mode" via vehicle menu.
3 - Unlink current wheels and link yours.
4 - Set correct descriptions on your wheels(WHEEL_FL, WHEEL_FR, WHEEL_RL, WHEEL_RR).
5 - Turn off "Edit mode". It's done.
Edit mode and all the car rotation steps can be skipped if you're sure you can set wheels straight on your own. Failing to do so will make your wheels wobble when in motion.

 
4. GMLS support: Yes.
The GMLS ID is LR_MARSHALLSEDAN_BASE
 
 
5. The vid - I've recorded a tiny video on the addon prims in case the text above is hard to understand. Sorry. Watch this: https://www.youtube.com/watch?v=VRapvNI8oCs
 
 
That's about it. I could write a little bit about scripting your own addons, but whoever's doing it, they already know how to. Track vehicle's linked messages, hook stuff up, you get the idea. Aight cool.


GEMC, 2023.

Friday, December 31, 2021

Alasdair AL5 v1.021 update

-Animation errors fixed majorly;
-updated cruise control(LM - Tradeline style, operation chapter added to the manual);
-updated passengers script, passengers can adjust their positions via menu, driver gets the passengers menu when sitting as a passenger too, and the whole thing is more robust now;
-updater script stripped of all the spammy nonsense, starting with v1.02 it'll only check for update upon rezzing;
-bus doors don't get choppy anymore after staying rezzed for a while;
-debug messages removed;  
-other fixes and improvements.

Friday, December 24, 2021

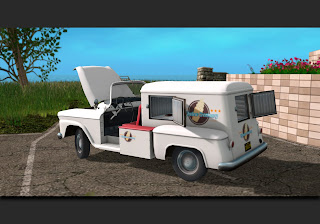
GEMC Ice Cream Truck release

  
Please make sure to check it out inworld before purchasing.

GEMC Ice Cream Truck manual

  This vehicle is built under "Real Scale" initiative. Learn more: https://sl-gemc.blogspot.com/2019/03/real-scale-initiative-by-gemc.html

Common features.
1. Fuel - this vehicle is equipped with GFS fuel system. It uses REGULAR FUEL. It has one fuel tank, accessible from back. Fuel capacity is roughly 17 gallons(77 liter).

2. Electricity - this vehicle is equipped with a battery and electricity consumption system. Battery is located inside the engine compartment. The system supports all GEMC batteries types, so you can choose your favorites. OEM battery for this vehicle provide 80Ah output each.(see Batteries and electrical devices policy update for details).

3. Gearbox - This vehicle is equipped with manual 4 speed gearbox. You can switch between positions with E/C or PgUp/PgDn buttons.
Gearbox positions:
Transmission lock - vehicle physics off;
R - Reverse;
N - Neutral;
1 through 4 - Forward gears.
The vehicle is equipped with innovative cruise control system. You can engage it by tapping W/Up key when in one of forward gears. System will be disengaged when you touch W/Up key again, or brake. You can select your desired speed using buttons on UniHUD, or by going to vehicle's menu, "Vehicle" - "SpeedLimit+"/"SpeedLimit-".

4. Starting sequence - this vehicle is equipped with realistic startup procedure. Click the ignition key on the dashboard once to turn the ignition on, and then click+hold the key to crank up the engine. Depending on vehicles's conditions, startup time may vary.
Additionally you can start the vehicle via UniHUD(see below). To do so, press the key button. Keep it pressed until the engine starts.
3rd method of starting the engine is to use gesture(gestures can be obtained from the UniHUD(question mark button - Gestures). In this case, the whole sequence is played automatically. 
 
Dashboard overview.

Dashboard controls
5. Dashboard controls:
1 - headlights switch(2 positions);
2 - ignition key;
3 - turn signals switch(short click - right turn signal, long click - left turn signal).;
4 - windshield wipers switch;
5 - lighter(has no real purpose, you press it, and then it pops out after 10 sec);

Other functions. 
6. HUD - This vehicle is utilizing second generation of GEMC UniHUD, which means dynamic controls layout and simple operation.

7. Occupants and animations - this vehicle provides room for a driver and one passenger. Both can adjust their seat using UniHUD control, as well as trigger the "wave" animation using a special button on the UniHUD. Driver can also press the Bells button on the HUD to ring the bells on the truck. Or just click the rope above the windshield.
Driver can use "Eject" function on their UniHUD to eject unwanted occupants. 

8. Ice Cream and distributing goods - Since this is an ice cream truck, I've equipped it with content distribution system, so you can distribute your own ice cream(or whatever) to others. To do so, simply drop your items into the content of the vehicle(make sure Transfer permission on your items is ON), and when people click the openings in the freezer, they will receive a random object from the ones that you've put in the truck's content. You can use "Door Lock" button on the UniHUD to lock and unlock freezer doors. Also there's already an OEM ice cream included.

9. Customizing - click the vehicle to get the menu, then click "Customize..." button, and you'll be presented with a number of customizing options. This is a fairly utilitarian vehicle, and doesn't offer a lot of options, so there's just 4 factory liveries(1 of them clean so you can tint the body color using SL tools and use it as a regular refrigerated van), 3 colors for the seats, and NTBI GLPS license plate system. Additionally you can modify the vehicle using SL's building tool. Please make sure to turn the vehicle's "EDIT MODE" on before editing, to ensure the stability. You can make your addon prims move with the vehicle's bonnet. In order to do so, add "ADDON_BONNET" prefix to their descriptions, in example: "ADDON_BONNET_CARGO" - that will make a prim move and be recognized by GTFO! system(see below).

9.1 EasyWheels project - I've added some code that lets you install any crappy ripped wheels(provided they're 1 prim each), regardless of their rotation, and without having to fiddle with numbers and whatnot. It can be done in a few simple steps:
1 - Set your car straight.
2 - Enable "Edit mode" via vehicle menu.
3 - Unlink current wheels and link yours.
4 - Set correct descriptions on your wheels(WHEEL_FL, WHEEL_FR, WHEEL_RL, WHEEL_RR).
5 - Turn off "Edit mode". It's done.
Edit mode and all the car rotation steps can be skipped if you're sure you can set wheels straight on your own. Failing to do so will make your wheels wobble when in motion.

 10. GTFO! support - this vehicle supports GTFO! system(https://sl-gtfo.com) out of the box. You can attach your prims to the vehicle and use them as a cargo. To do so, change the description of your cargo prims to "CARGO"(without quotation marks). This will make those prims elegible for participation in our cargo loading/unloading scripted sequence. Cargo prims will be loaded starting with the ones that are placed deeper inside the vehicle, and going towards the outside. Unloading is performed in reverse. Additionally you can make your cargo/luggage prims move with the bonnet. In order to do so, add "ADDON_BONNET" prefix to their descriptions, in example: "ADDON_BONNET_CARGO" - that will make a prim move and be recognized by GTFO! system.

GEMC Ice Cream Truck livery template(click). 

GEMC, 2021.

Tuesday, October 12, 2021

Platypus Typ 707 v1.6 update

-Animation errors fixed majorly;
-legacy scale version removed;
-driving scripts updated with cruise control, operation explanation added to the manual;
-NTBI GLPS license plate system support added;
-2nd GTFO! vapi key added for water deliveries;
-(modify version only)additional prims can now be linked to the bonnet to be used as luggage/GTFO! cargos(see updated paragraph 16 in the manual);
-updater script stripped of all the spammy nonsense, starting with v1.6 it'll only check for update upon rezzing;
-other fixes and improvements.


GEMC, 2021
 

Friday, June 11, 2021

Minamoto Sky Messenger v2.0 update

 -Resized to RL scale(legacy scale versions still available for a short period);
-modify version upgrade possible via using provided vendor;
-all customization moved to menus;
-shorter rear overhang to match RL proportions;
-amount of passenger seats reduced to 29 to match RL spec;
-updated geometry with better shading;
-updated lods;
-updated physics shape for better detection;
-smooth doors operated by a single script;
-seams added for better fuel doors visibility;
-some texture fixes;
-updated normal maps;
-subtle ambient occlusion added to body texture;
-updated animations for RL scale versions;
-animesh battery charger support for all versions;
-2021 driving scripts with cruise control and adjustable steering, operation chapter added to the manual;
-fuel tank is now picked automatically when fueling, distance-based;
-new more stable passengers script;
-passengers can adjust their seats using both HUD and menu;
-smoother horn;
-some new sounds for doors;
-GTFO! support;
-dynamic license plates;
-NTBI GLPS support for LHD version;
-other fixes and improvements.


GEMC, 2021

Saturday, May 29, 2021

Minamoto Sky Traveller v2.0 update

-Resized to RL scale(legacy scale versions still available for a short period);
-modify version upgrade possible via using provided vendor;
-All customization moved to menus;
-updated geometry with better shading;
-updated lods;
-updated physics shape for better detection;
-smooth doors operated by a single script;
-seams added for better fuel doors visibility;
-some texture fixes;
-updated normal maps;
-subtle ambient occlusion added to body texture;
-updated animations for RL scale versions;
-animesh battery charger support for all versions;
-2021 driving scripts with cruise control and adjustable steering, operation chapter added to the manual;
-fuel tank is now picked automatically when fueling, distance-based;
-new more stable passengers script;
-passengers can adjust their seats using both HUD and menu;
-smoother horn;
-some new sounds for doors;
-GTFO! support;
-dynamic license plates;
-NTBI GLPS support for LHD version;
-other fixes and improvements.


GEMC, 2021


Thursday, May 27, 2021

GEMC Origin v1.1 update

 - Adjusted handling;
- Updated cruise control(LM - Tradeline style, operation chapter added to the manual);
- Additional sfx for brakes;
- Glow effect on the interior light restored;
- NTBI GLPS added;
- possible fix for anim errors after sim crossings;
- other fixes and improvements. 

GEMC, 2021

Wednesday, April 28, 2021

Iwaki B-series manual

  This vehicle is built under "Real Scale" initiative. Learn more: https://sl-gemc.blogspot.com/2019/03/real-scale-initiative-by-gemc.html

Common features.
1. Fuel - this vehicle is equipped with GFS fuel system. It uses DIESEL FUEL. It has one fuel tank, accessible from the right side. Fuel capacity is roughly 26 gallons(100 liter).

2. Electricity - this vehicle is equipped with two batteries and electricity consumption system. Batteries are located under the vehicle, next to the main door. The system supports all GEMC batteries types, so you can choose your favorites. OEM batteries for this vehicle provide 80Ah output each.(see Batteries and electrical devices policy update for details).

3. Gearbox - Iwaki B-series bus is equipped with manual 5 speed gearbox. You can switch between positions with E/C or PgUp/PgDn buttons.
Gearbox positions:
Transmission lock - vehicle physics off;
R - Reverse;
N - Neutral;
1 through 5 - Forward gears.
The vehicle is equipped with innovative cruise control system. You can engage it by tapping W/Up key when in one of forward gears. System will be disengaged when you touch W/Up key again, or brake. You can select your desired speed using buttons on UniHUD, or by going to vehicle's menu, "Vehicle" - "SpeedLimit+"/"SpeedLimit-". This system is similar to the one I used on ZAMANI Ravago.

4. Starting sequence - this vehicle is equipped with realistic startup procedure. Click the ignition key on the dashboard once to turn the ignition on, and then click+hold the key to crank up the engine. Depending on vehicles's conditions, startup time may vary.
Additionally you can start the vehicle via UniHUD(see below). To do so, press the key button. Keep it pressed until the engine starts.
3rd method of starting the engine is to use gesture(gestures can be obtained from the UniHUD(question mark button - Gestures). In this case, the whole sequence is played automatically. 
Useful tips: If you want to speed up the proccess, use your primer pump until it won't budge, this way you'll pre-fill your fuel system and remove the need for the engine to do this job. Additionally you can evacuate excessive air pressure from the cylinders by using your decompression lever, in this case the starter will spin up the engine quicker, and all you have to do is to put the decompression lever back into default position when you start hearing some combustion going.
 
4.1 Hand cranking - in case of dead batteries, you can hand crank the engine to make it start. To do so, first turn the ignition key to ON position, then open the bonnet, locate the cranking handle mounted inside the engine compartment, click it to insert it through a slit in a front bumper. Then click the decompression level to evacuate excessive pressure from the engine's cylinders. Now you can click and hold the cranking handle to spin the engine. It will take a bit of time. When you begin hearing occasional combustion and see the exhaust smoke, quickly put the decompression lever into default position, the engine will start right away. 
Make sure to use your primer pump to fill up the fuel lines so the startup takes less time.

Dashboard overview.

Dashboard controls
Dashboard controls(mirrored for LHD versions)

5. Dashboard controls:
1 - ignition key;
2 - headlights switch(3 positions);
3 - turn signals switch(short click - right turn signal, long click - left turn signal).;
4 - top lights switch;
5 - windshield wipers switch;
6 - interior illumination switch;
7 - route sign illumination;
8 - interior fan switch(3 positions);
9 - interior heater valve control;
10 - engine decompression lever.;
Useful tip: interior heater in combination with interior fan can be used to improve engine's cooling.

 Engine overview.

6. Engine controls:
1 - primper pump;
2 - decompression lever linkage;
3 - throttle linkage.

Other functions. 
7. HUD - This vehicle is utilizing second generation of GEMC UniHUD, which means dynamic controls layout and simple operation.

8. Occupants and animations - depending on the model, this vehicle can provide room for up to 25 occupants, including driver.
Passengers can change their seats by using the bus menu, or their UniHUD(obtained from the vehicle). Passengers can also adjust their positions by using the bus menu or their UniHUD.
Driver can use "Eject" function on their UniHUD to eject unwanted occupants. 

9. GTFO! support - this vehicle supports GTFO! system(https://sl-gtfo.com) out of the box. By default, this vehicle uses its built-in luggage for GTFO! visuals(roof rack must be enabled), but you can attach your prims to it and use them as a cargo. To do so, change the description of your cargo prims to "CARGO"(without quotation marks). This will make those prims elegible for participation in our cargo loading/unloading scripted sequence. Cargo prims will be loaded starting with the ones that are placed deeper inside the vehicle, and going towards the outside. Unloading is performed in reverse. 

10. Customizing - click the vehicle to get the menu, then click "Customize..." button, and you'll be presented with a number of customizing options. These include 11 pre-made colors, 11 pre-made liveries, an option to add a custom livery, dynamic license plates(LHD versions use new NTBI GLPS system), and a number of other addons such as cargo rack, mud flaps, ability to add custom route signs and so on. Additionally you can modify the vehicle using SL's building tool. Please make sure to turn the vehicle's "EDIT MODE" on before editing, to ensure the stability.

Iwaki B31 Livery template(click). 
Iwaki B32 Livery template(click).
Route sign template(click).
Make sure to use 32 bit TGA format for route signs.


GEMC, 2021.


Iwaki B31/32 release


Marketplace: https://marketplace.secondlife.com/p/GEMC-Iwaki-B3132/21815691
SLURL: http://maps.secondlife.com/secondlife/NTBI/69/127/24
Please make sure to check it out inworld before purchasing.

Wednesday, March 18, 2020

Alasdair AL-series manual

 This vehicle is built under "Real Scale" initiative. Learn more: https://sl-gemc.blogspot.com/2019/03/real-scale-initiative-by-gemc.html

Common features.
1. Fuel - this vehicle is equipped with GFS fuel system. It uses DIESEL FUEL. It has one fuel tank, accessible from the right side. Fuel capacity is 53 gallons(200 liter).

2. Electricity - this vehicle is equipped with two batteries and electricity consumption system. Battery compartment is located on the right side of the vehicle, next to the front wheel. The system supports all GEMC batteries types, so you can choose your favorites. OEM batteries for this vehicle provide 80Ah output each.(see Batteries and electrical devices policy update for details).

3. Gearbox - Alasdair AL-series busses are equipped with automatic gearbox. You can switch between positions with E/C or PgUp/PgDn buttons.
Gearbox positions:
Transmission lock - vehicle physics off;
R - Reverse;
N - Neutral;
D - Drive.
You can shift up from the D gear to engage or disengage speed limiter or cruise control.
You can also change gears by clicking their corresponding buttons manually(gears 1-3 are accessible only via clicking).

4. Starting sequence - this vehicle is equipped with realistic startup procedure. Click the ignition switch on the dashboard once to turn the ignition on, wait for the glow plugs signal lamp to turn off, and then click+hold the switch to crank up the engine. Depending on car's conditions, startup time may vary.
Additionally you can start the vehicle via UniHUD(see below). To do so, press the key button. Keep it pressed until the engine starts.
3rd method of starting the engine is to use gesture(gestures can be obtained from the UniHUD(question mark button - Gestures). In this case, the whole sequence is played automatically. 
4.1 Engine compartment start/stop controls - to start the engine from within the engine compartment, set the ignition switch on the dashboard to ON position, and then press and hold the green "Start" button inside the engine compartment. To stop the engine from the engine compartment, click the red emergency shut-off switch. In order to be able to start the engine again, click the emergency shut-off switch again to release it.

Dashboard overview.
Dashboard controls

5. Dashboard controls:
1 - interior lights master switch(ON by default);
2 - 1st deck lights;
3 - 2nd deck lights;
4 - interior fan(fan sound on/off);
5 - air conditioner(just for the looks, no effect on gameplay);
6 - heater(just for the looks, no effect on gameplay);
7 - driver's area illumination;
8 - route sign illumination;
9 - gear selector buttons. Gears 1-3 can be triggered only by clicking their corresponding buttons.
10 - reverse sound alarm on/off(ON by default);
11 - battery master switch(ON by default);
12 - wheelchair ramp(powered by electricity);
13 - ignition switch(see chapter 4);
14 - hazard lights;
15 - fog lights(must be enabled via customization menu);
16 - headlights;
17 - park lights;
18 - gauges illumination(ON by default, wired to the headlights);
19 - assault alarm switch;
20 - combined stalk switch. Click the spinning part to toggle wipers. Click the stalk itself to toggle turn signals(short click - right turn signal, long click - left turn signal).
 Additionally there's a pannel to the right from the driver. It contains parking brake lever, and doors control pannels. Door controls are self-explanatory. There are controls for individual door wings, or for the entire door. You can also operate them via UniHUD. If you want to operate them from the outside, simply click the respective emergency door control lid on the side of the bus.

6. Speed limiter and Cruise Control - this car is equipped with those two options. Both can be toggled by shifting up from D gear. By default it is speed limiter, and you can switch between the speed limiter and Cruise Control by using either menu(Vehicle - Limiter/Cruise), or a special button on the UniHUD. You can adjust desired speed using "Limit+" and "Limit-" buttons in the "Vehicle" sub-menu or on the HUD. If you have Cruise Control mode selected, you can adjust your speed via keyboard when the CC is on. Press W(Up) key to increase speed by 5 units, press C(PgDown) to decrease. Stopping the vehicle by using the brakes will disable the CC.
 
Other functions. 
7. HUD - This car is utilizing second generation of GEMC UniHUD, which means dynamic controls layout and simple operation.

8. Occupants and animations - depending on the model, this vehicle can provide room for up to 73 occupants, including driver.
Passengers can change their seats by using the bus menu, or their UniHUD(obtained from the vehicle). Passengers can also use "Stop" buttons mounted on handrails inside the bus, to alert the driver.
Driver can use "Eject" function on their UniHUD to eject unwanted occupants. 

9. GTFO! support - this vehicle supports GTFO! system(https://sl-gtfo.com) out of the box. Being a city bus, it doesn't come with built-in cargo visuals, but you can attach your prims to it and use them as a cargo. To do so, change the description of your cargo prims to "CARGO"(without quotation marks). This will make those prims elegible for participation in our cargo loading/unloading scripted sequence. Cargo prims will be loaded starting with the ones that are placed deeper inside the vehicle, and going towards the outside. Unloading is performed in reverse. 

10. Customizing - click the vehicle to get the menu, then click "Customize..." button, and you'll be presented with a number of customizing options. These include 11 pre-made colors, 11 pre-made liveries with and without ads, an option to add a custom livery, dynamic license plates with UK/HK type option and custom background image, and a number of other addons such as fog lights, ability to add custom route signs and so on. Additionally you can modify the vehicle using SL's building tool. Please make sure to turn the vehicle's "EDIT MODE" on before editing, to ensure the stability.

AL5 Livery template(click).
AL5 Spec map template(click).
Front route sign w:h ratio: 32:10.
Rear route sign w:h ratio: 16:9.


GEMC, 2020.

Monday, December 9, 2019

GEMC Semi-trailer system manual

This article will cover the installation and setup process for GEMC semi-trailer system, as well as the functions of included semi-trailer.

Our semi-trailer system comes in two parts: the hitch, and the semi-trailer.

 To install the hitch, simply link it to one of compatible vehicles, which includes
Lusch Motors - Hermes-series trucks,
Lusch Motors - Ajax-series trucks, as well as
Lusch Motors - Hermes with installed Buck Municipal addon by GEMC.
Make sure you're using a clean unmodded version of the vehicle. You can perform all the modifications later.
 Once you've linked the hitch, it will adjust itself automatically, and you will be presented with a configuration menu. You will be able to configure the chassis to a 4x2 preset, or leave it as it is. If you want to add more wheels, you'll have to do that manually.
 When the setup is completed, you will notice HUD layout changing to the one of semi-truck.

Now it's time to rez the trailer.
 To attach the trailer to the truck, back up the truck under the trailer's pin area, exit the truck, and then click the "semi-trailer" button on the HUD. If there's more occupants inside the cab, they will have to exit, otherwise the system won't work(it's a safety measure). Once the trailer detects the truck, you will be asked for a linking permission. Grant it, and the trailer will attach.
 To detach the trailer, do exactly the same - exit the truck, and click the "semi-trailer" button on the HUD, then grant linking permission.
Alternatively, you can click the handle on 5th wheel coupling instead of the button on the HUD.

If you have trouble with following these instructions, you can refer to the following illustrations: Installing the hitch, Attaching the trailer.

The trailer in this package is a standard 40ft US box trailer with a regular tail gate.
 When the trailer is not attached to a tractor, you can click the trailer to access its menu. When it's attached, navigate to "Customize..." - "Back Addon" to access trailer menu. It features a number of simple liveries, as well as an option to add a custom one, two types of wheels(new and worn), an option to toggle the cargo, and an option to lock or unlock the tail gate.
 You can paint the semi trailer using GEMC Paint Spray can. When it's attached to the cab, it's getting painted as a whole(Main livery for the truck itself, Livery Aux 1 for the trailer body, and Livery Aux 2 for the tailgate). When it's not attached, it will use main livery for the trailer body and Livery Aux 1 for the tailgate.
The tail gate operates only when the speed is lower than 1 mph. When the truck is moving, clicking the tail gate will bring up the truck menu.

Driving with a semi-trailer is fairly simple. Truck's speed is limited to approximately 35 mph, and acceleration is slower to reflect the presence of a semi-trailer. However, you may like to practice driving with the trailer in some open space before departing.
Since the trailer is not a physical object and uses math for rotation, it doesn't account for any sort of surrounding geometry. So in a rare case of it getting stuck in some other objects like buildings or walls, you can click the trailer for approx 1.5 seconds, and  it will become phantom, so it can pass through geometry. When you're out of trouble, you can perform a long click on it again to make it solid.
When driving in a laggy environments, you may notice that trailer is moving a bit choppy. This is done on purpose to negate the timer stretching effect from the sim lag, and so the trailer's overall rotation speed stays the same.

The trailer is GTFO!-enabled, so you can perform your cargo runs with it like with any other OEM back addon for Lusch Motors trucks(more about GTFO!).

Technical limitations: the whole trailer is a single prim so you can't link stuff to your vehicle in order to make it move with the trailer.

Livery template for the trailer body(click)
Livery template for the tail gate(click). Please inspect the original tail gate texture inworld to see how it's done.


GEMC, 2019

Monday, September 30, 2019

Platypus Typ 707 v1.5 update

Hi there,
in this article we will cover the 2019 update for our Platypus Typ 707.

First, the biggest change of them all - our "Real Scale" initiative has made its way in, so now Platypus is tiny and adorable, as it should be. However, for this time we will be providing a so called "Legacy" version, which is the size Platypus used to be. It's also updated to v1.5 code.

Now, let's run through the other changes of v1.5:
- built-in GTFO! support for every v1.5+ version(Legacy, real scale, mod), with support for custom cargos in modifable version(see updated manual);
- adjustable steering;
- redone animations for the real scale version;
- enforced avatar's positions(hopefully no avatar riding outside the vehicle after poor crossing);
- updated tablet navigation(rotating map and proper voice cut-offs);
- "Major Repair" option is available at all times(like on LM Scout and Ajax);
- all customization has been moved to menus(once again like on recent Lusch Motors products or GEMC Origin);
- Animesh charger support(we didnt have to update a single thing to make it work with both sizes of the vehicle, aint that a magic!);
- a number of other minor changes such as redone eject code and so on.
- you can upgrade your Platypus(Real Scale version only) to a modifable version for a mere L$500(vendor included in the package). It's not really a money maker, but more of a paywall to make people think twice whether they want to get into all those mod shennanigans or not. We don't want to bestow a modifable version on someone who has no idea what to do with it, so they damage it, and somehow make it our problem.


GEMC, 2019

Friday, September 27, 2019

QOL fix for the animesh charger(in case you missed it in the group)

1) Make a new script inside your animesh charger.
2) Replace the default code in that script with the following:

default
{
    state_entry()
    {
       llSetLinkPrimitiveParamsFast(2, [
       PRIM_POSITION, <-2.80690, -0.00900, 0.00030>,
       PRIM_ROTATION, llEuler2Rot(<0.00000, 90.00000, 0.00000>*DEG_TO_RAD)/llGetRootRotation(),
       PRIM_SIZE, <0.47807, 0.42478, 2.97735>,
       PRIM_SLICE, <0.94, 1.0, 0>]);
     llRemoveInventory(llGetScriptName());
    }
}

3) Save the code.
4) ????????
5) PROFIT!

Or visit a redelivery terminal and get your charger package redelivered(there's no version change, so it doesn't get delivered automatically).

GEMC, 2019

Tuesday, July 9, 2019

GEMC JG 1500 Charging unit update

Now it has an Animesh version, which will be used for new and updated products. There's still an old version with pre-made cables, but we'll be moving away from it.

A little QnA on animesh charger:

Question: LI on this thing is pretty high, why?
Answer: Yes, by default it has relatively high LI(21-22) due to built-in limitations on animesh. The lowest LI of animesh-enabled model is 15, so even enabling it on a simple cube will make it 16LI.
But! Not everything is lost. If you're planning to store your charger inworld, you can disable the Animesh by unticking the "Animated mesh" checkbox in the object's Features tab of edit window. This will bring the LI down to 2(lower than legacy version). You still can use it for charging with Animesh disabled, but you won't be able to see animated cables. 
Q: Apart from the fanciness, why did you even bother with switching to Animesh, the old version worked just fine!
A: Main benefit of the Animesh charger is that we don't have to update it every time a new vehicle comes out, so this current version(2.1) will probably be the last.
Q: How exactly does this work?
A: Actually it's quite simple. After you connect your charger to the vehicle, and the handshake is done, the vehicle passes the animation for the cables to the charger(animation is fullperm and useless otherwise). Once the charging is finished, the animation is erased from the charger's inventory.
Q: Are there gonna be more vehicles that use Animesh charger?
A: Yes, of course. Older vehicles will get updated to this version as well, when they get scaled down following our "Real Scale" initiative. At first there will be 2 versions of those vehicles - legacy size for those who want to see how it was before, and real scale which will become the main branch for future updates. And once again thanks to the nature of Animesh, we won't have to update the charger to add cables for the vehicles of different size(see Question 2).

Well, that's about all the info you need about the new charger. The operation remains the same - align its back wall towards the vehicle and click to get the menu.


GEMC, 2019.

Saturday, March 16, 2019

GEMC Origin manual

 This vehicle is built under "Real Scale" initiative. Learn more: https://sl-gemc.blogspot.com/2019/03/real-scale-initiative-by-gemc.html

Common features.
1.
Fuel - this vehicle is equipped with a custom fuel/power system. It can be charged using the provided charging station. Additionally you can charge it at any Volta EV-C charging station(Volta to J1773 adapter will be shown, click the charge port cap to hide it). To start charging the vehicle, park it in front of a charging station, and then click it. To stop charging, click the charging station again.

2. Gearbox - GEMC Origin is equipped with automatic single-speed gearbox. You can switch between positions with E/C or PgUp/PgDn buttons.
Gearbox positions:
P - vehicle physics off;
R - Reverse;
N - Neutral;
D - Drive;
C - Speed Limiter or Cruise Control(see later in the article).

3. Starting sequence - this vehicle is equipped with realistic startup procedure. Input 4-digit PIN on the keypad, then press "Run" button. To stop the car, press "Lock"button(see the illustration below)

4. Other way of starting car up is clicking a button on GEMC UniHUD v2(manual).
And last way is to use gesture(in this case you just have to press a combo of buttons once, and wait for the car to start up). 

Custom features.
5. Dashboard controls - dashboard controls are explained on the picture below.

Dashboard controls

6. Keypad(1) - use it to input your PIN. Press a button twice to go to a 2nd number. Press "Clear" button to erase the current input. You can set a new pin in "Vehicle" sub-menu.
7. HVAC(3) - it's a purely visual thing, you can click a bunch of buttons, and some things happen. Notice, high fan speed may increase power consumption.

8. GAGE button(5) - press it to switch between charge level and current power consumption display.

9. Trip/Reset buttons(4) - press "Trip" button to switch between trip meter and odometer. Press "Reset" button to reset trip meter.

10. Mi/km button(7) - press it to switch between imperial and metric output.

11. Dimmer controls(6) - press those buttons to increase or decrease brightness of the LCD displays.

12. Clock setup(8) - press HR/MIN button to set the clock. Press and hold to switch between 12/24h.   

Other functions. 
13. HUD - This car is utilizing second generation of GEMC UniHUD, which means dynamic controls layout and simple operation.
 
14. Speed limiter and Cruise Control - this car is equipped with those two options. Both can be toggled by shifting up from D gear. By default it is speed limiter, and you can switch between the speed limiter and Cruise Control by using either menu(Vehicle - Limiter/Cruise), or a special button on the UniHUD. You can adjust desired speed using "Limit+" and "Limit-" buttons in the "Vehicle" sub-menu or on the HUD. If you have Cruise Control mode selected, you can adjust your speed via keyboard when the CC is on. Press W(Up) key to increase speed by 5 units, press C(PgDown) to decrease. Stopping the vehicle by using the brakes will disable the CC.

15. Occupants and animations - this car provides room for 2 occupants. Passenger can receive their own copy of UniHUD by clicking the vehicle and selecting "Get HUD" option, and then use it to control their window and adjust their seat.
Eject function is accessible from GEMC UniHUD, and provides eject through dialog menu.

16. GTFO! support - this vehicle supports GTFO! system(https://sl-gtfo.com) out of the box. Given its modifiable nature, you can attach your prims to it and use them as a cargo. To do so, change the description of your cargo prims to "CARGO"(without quotation marks). This will make those prims elegible for participation in our new cargo loading/unloading scripted sequence. Cargo prims will be loaded starting with the ones that are placed deeper inside the vehicle, and going towards the outside. Unloading is performed in reverse.

17. Customizing - click the car to get the menu, then click "Customize..." button, and you'll be presented with a number of customizing options. These include 16 pre-made colors, an option to add a custom livery, dynamic license plates with US/EU size option and custom background image, and a number of other addons such as luggage rack, ability to add custom hubcaps and so on. Additionally you can modify the vehicle using SL's edit mode. Please make sure to turn the vehicle's "EDIT MODE" on before editing, to ensure the stability.

Livery template(click)


GEMC, 2019.